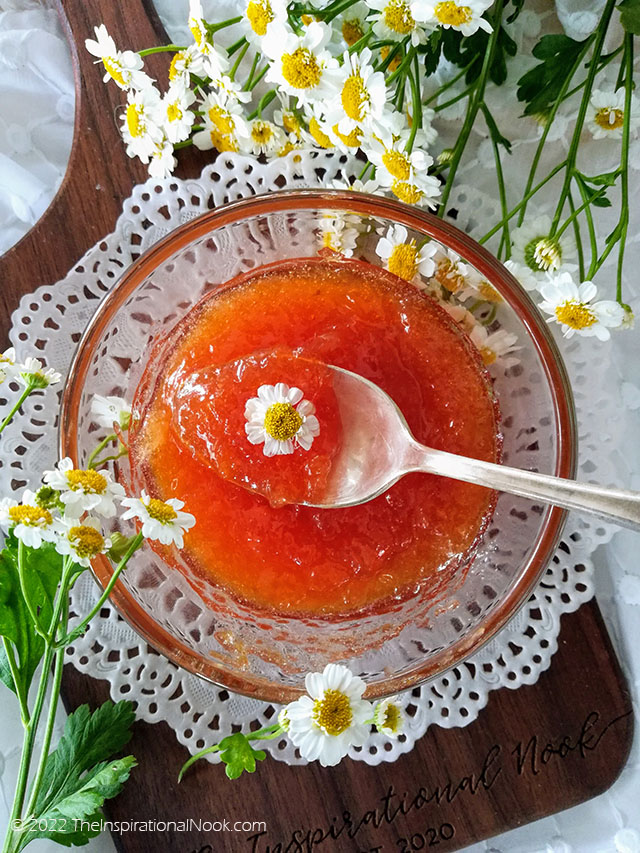
Low Sugar Peach Jam Without Pectin
How peachy is this? I made this low sugar peach jam without using any pectin. No one would ever guess that this jam uses half the amount of sugar than most jam recipes call for.
And it gets better...
Shhhhh... don't tell anyone but my peach jam is made from slightly bruised, 'seconds fruit' that I bought at my local farmer's market for half price off. Look at the beautiful golden orange color, despite using slightly discolored, over ripe fruit.
What is the Ratio of Fruit to Sugar When Making Jam?
Typically, the ratio of fruit to sugar when making traditional jams is 1:1.
So, 200g fruit and 200g sugar.
What is the Fruit to Sugar Ratio in Low-Sugar Jams?
In my low sugar peach jam recipe, my fruit to sugar ratio is 2:1. I use half the quantity of sugar to fruit. So, for 200g fruit, I use only 100g sugar. Do note that sugar acts as a preservative in jams. So, due to the lower sugar content in low-sugar jams, these types of jam will not last as long as regular jams.
Can I Use Bruised Peaches for Jam?
Oh yes! This batch of jam that I created is made from slightly banged up fruit. The peaches were over-ripe and slightly bruised, but they were perfect for my jam making project.
It's much easier to peel over-ripe peaches (use a potato peeler or a sharp knife) and the fruit is sweeter and juicier than under ripe/ just-ripe fruit.
And the best part (other than the fruit being half price) was that the color of the jam did not get altered. Even though the bruised fruit was slightly brown, the jam still cooked into a delightfully golden-orange color.
 |
| I used slightly bruised, over-ripe peaches to make my peach jam. |
How to Make Low Sugar Peach Jam
In a nutshell, here are the process steps. The recipe follows at the end.
1. Peel and cut peaches into small bits.
 |
| Cut peaches into small bits. |
2. Boil fruit with lemon juice until fruit is soft and water content has reduced.
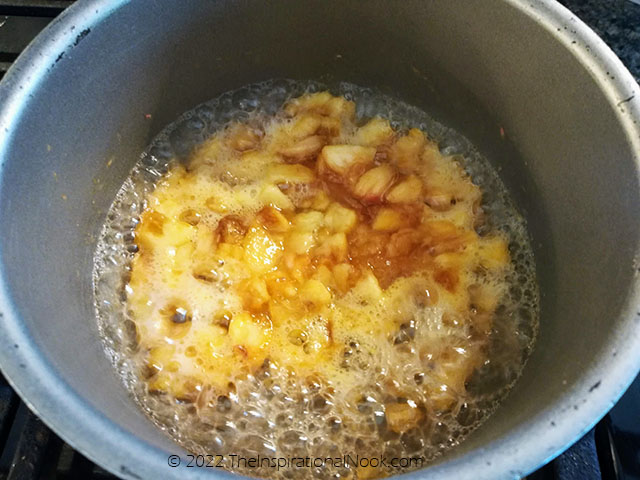 |
| Water releases from the fruit, as it starts to boil. Notice the large bubbles. |
 |
| Water content eventually reduces, mixture become thicker and golden. Notice the small bubbles and holes forming. |
3. Remove from heat, and slowly add in sugar to warm mixture. Stir well to dissolve all sugar.
 |
| Remove from heat and stir sugar into warm mixture. Stir until dissolved. |
4. Return to heat and continue to cook until mixture starts to thicken and coats back of spoon.
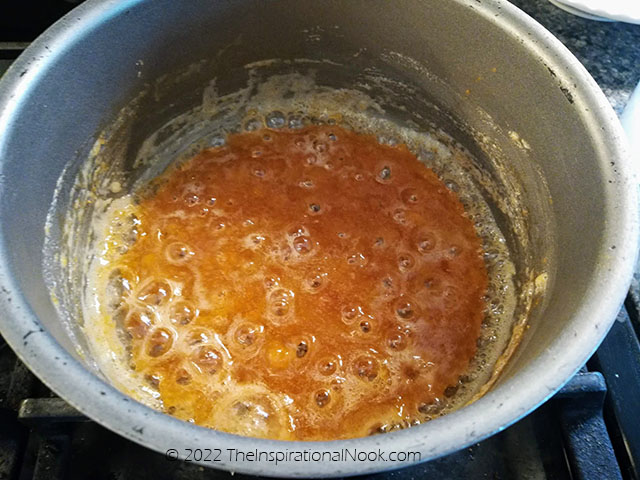 |
| Return to heat and bring to a boil. |
5. Test for doneness by dropping some hot jam on a cold plate. A line drawn through the jam should not close up.
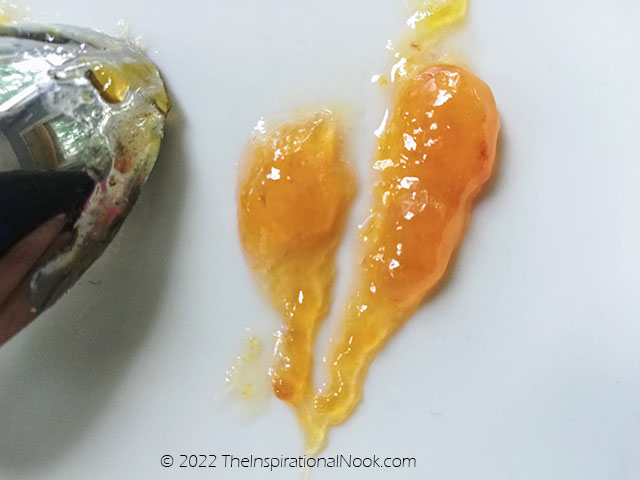 |
| Run the tip of teaspoon through some jam dropped on a cold plate. If the line does not close, the jam is done and has reached setting point. |
In my recipe, I've used a small batch of fruit (200g) to make a mini batch of jam.
I've also listed general cooking time as a loose guideline for this quantity of fruit. Please note that cooking time will vary depending on the quantity of fruit being used, water content in the fruit, heat etc.
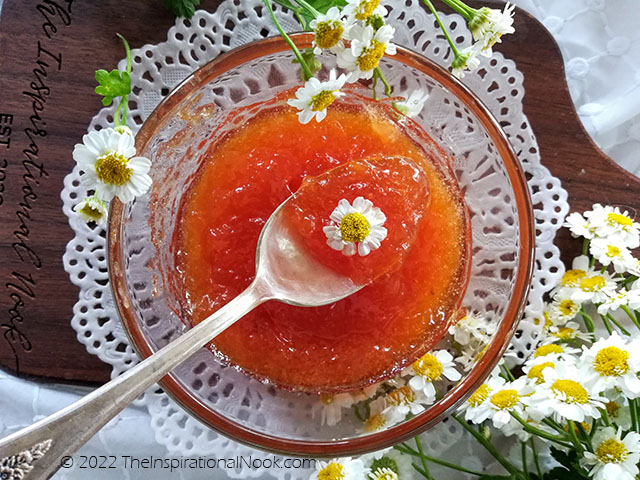 |
| Low Sugar Peach Jam made from bruised fruit. |
How to Prevent Jam from Crystallizing
Crystals
form in jam for a number of reasons. Adding too much sugar, not making
sure that all the sugar has dissolved during the cooking process or
cooking the jam to much or too little.
In this low sugar jam, the most likely reason crystals would form in the jam is improperly adding and cooking the sugar while making the jam.
To prevent crystals forming in a low sugar jam, after the boiling fruit has turned to mush and once you are ready to add in the sugar:
- Be sure to take the pan off the stove and allow the mixture to cool. The sugar should be added to a warm mixture, not a hot or boiling mixture.
- Don't dump the sugar in, but add the sugar in slowly, stirring well to dissolve the sugar.
- Stir well and check that all sugar has dissolved in the warm mixture. All sugar has dissolved if you can no longer feel sugar at the bottom of the pan when you stir the mixture.
- Now return the pan to the heat and bring the mixture to a boil and continue to cook
How Do You Know When Peach Jam is Done?
To
check for doneness in a jam, have a set of wooden spoons handy and keep
one or two plates in the freezer. You will use the cold plates to cool a
little of the jam quickly to see if it is done/sets.
- When checking for doneness, dip
a wooden spoon in the jam and lift it up. The jam should coat the back
of the spoon and not run off the spoon and drip back into the pan. The
jam on the back of the spoon should look shiny and cling to the spoon. Use a fresh wooden spoon each time you test.
- When checking for doneness, take the saucepan off the stove and test for doneness by dropping a bit of hot jam onto a cold plate kept in the freezer. Return to the freezer for 15 seconds, then run a teaspoon through the center of the jam. The line through the jam should remain and not close up. If it does, return the jam to the stove and continue to cook a little longer. Repeat the testing process from time to time.
Small Batch Peach Jam Recipe
Ingredients:
Step- by-Step Instructions:
1. Prep Peaches
- Choose ripe/over-ripe peaches. Over ripe peaches will be sweeter and juicier than firm peaches.
- Peel the skin off peaches using a potato peeler.Discard skin and peach stones.
- Chop peaches into small bits.
2. Cook Fruit
- 0 minute mark:
- Add the chopped fruit to a saucepan. Pour in the lemon juice and bring the mixture to a boil on medium,-high heat. Cook uncovered.
- The fruit will start bubbling as it starts releasing water. (The mixture will get quite liquidy).The sweet smell of cooking fruit will release at this time.
- The mixture will start getting very frothy and the froth will rise in the pan.
- Stir from time to time to dissipate the froth and allow the water to evaporate.
- 5 minute mark-
- As most of the water evaporates, the mixture will start looking thicker and will look slightly reduced.
- There will be noticeably less froth and the height of the mixture in the pan would have reduced.
- Holes will start to form in the mixture.
- The mixture will take on a beautiful golden color.
3. Add Sugar
- 8 minute mark
- Once the mixture reduces and holes start to form in the mixture, it's time to add the sugar.
- Take the pan off the heat to bring the temperature of the mixture down. (The mixture should be warm, not hot and definitely not boiling. This is important to prevent the formation of crystals later on in the jam.)
- Add the sugar in slowly to a warm mixture. Stir well to melt the sugar and ensure all sugar granules have dissolved.
- As the sugar melts into the fruit mixture, the color will darken to a deeper, gold color.
- 15 minute mark
- Once the sugar has dissolved, return the pan to the heat, bring to a boil and continue cooking.
4. Test for Setting Point
- 16-17 minute mark
- Dip a wooden spoon in the jam and lift it up. The jam should coat the back of the spoon and not run off the spoon and drip back into the pan. The jam on the back of the spoon should look shiny and cling to the spoon.
- Take the saucepan off the stove and test for doneness by dropping a bit of hot jam onto a cold plate kept in the freezer. Return to the freezer for 15 seconds, then run a teaspoon through the center of the jam. The line through the jam should remain and not close up. If it does, return the jam to the stove and continue to cook a little longer. Repeat the testing process from time to time, taking the pan off the heat each time you test.
- 17 minute mark
- My small bath of peach jam is done around this time. Take the saucepan off the stove. Leave it to cook for about 10 minutes, before pouring it into a clean, glass jar.
Kitchen Tips:
- Keep a bunch of wooden spoons handy while making jam. Use them to stir the mixture, when cooking.Use a fresh wooden spoon each time when checking for doneness/ setting point.
- For a less chunky jam, use over-ripe peaches cut into small bits. As the fruit is cooking, use the back of the wooden spoon to crush the boiling fruit against the sides of the pan.
- Low Sugar jams, because of the lower sugar content, spoil quicker. So, make low-sugar jams in smaller jars so that you can finish it quicker once you open it.
